Tuesday, February 7, 2012

Valentine's Day DIY for Preschoolers -printable


If you're not already on Pinterest, you MUST go check it out. There is an unlimited amount of just amazing ideas for DIY crafts, recipes, home decor, etc. Thanks to Pinterest, I came across this great idea for making heart shaped crayons from the girls left over and broken up crayons. When you have 2 toddlers, you can only imagine how many crayons we have laying around.

This is where I got my idea:
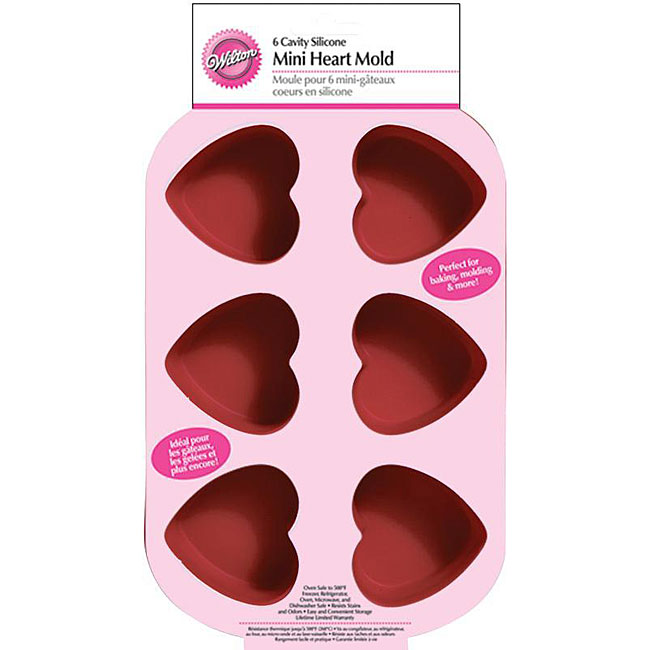


I bought my silicone pan at Joann's a few weeks ago for 50% off. Right now, it might even be 60% off! It worked perfect.


I bought red scrapbook paper and these adorable heart shaped stickers, both on sale at Joann's as well. And if you haven't downloaded the Joann app, do it! You get the 40% coupons via your phone.

The girls had a blast helping me remove the paper and watching their "cookies" melt in the oven. The end products were beautiful colorful crayons. We cut the red paper to about 4.25" x 4.5" with a paper cutter. I made up these quick little papers with the saying and their names on it and they adhered the hearts themselves with double stick tape. We used the heart stickers to keep the white papers on.

Here are my favorite preschoolers showing off their work!


As you may or may not know, the March of Dimes is a very near and dear to our hearts, as those sweet 3 year olds you see above, were born at 2lbs 14oz and 3lbs 2oz! We donate a percent of our sales as well as raise money for our local walk every year. If you donate $5 to our cause (the minimum donation amount). I will send you a hi-res pdf of these printable personalized tags with your lil' ones name on them so you can create these at home! Just shot me an email at info@lillj.com to let me know you've donated. DONATE NOW

Wednesday, September 14, 2011

Our Twincesses Third Birthday Party : Tangled

My miracle girls turned 3 Sept 2nd and we celebrated with a Tangled Themed Party. I loved every minute of creating everything for the party. The only downfall is that nothing is ever perfect. We never played our Flynn Skillet Game, I completely forgot to hand out the favors and we never did get pictures of all our guests behind the tower. However, everyone had a blast and I could tell that even at 3, our girls loved and appreciated every minute of it! I thought I'd post about it, as I loved going through Pinterest and blogs searching for ideas and reading about other parties. This is the Pinterest board that I started for my inspiration.

The invitation was mailed in a clear mailing tube. I printed the invitation on one side and a stone graphic on the other. We braided yellow yarn that I found on clearance for the hair. I used that same yellow yarn for the sign on the front door. I found the idea for the front door on this blog. I designed and printed the welcome sign and then mounted it to heavy stock. The flags on the lamp post are simply laser prints cut and taped so that the design is on both sides.


I made this tower for the girls out of left over cardboard, a hot glue gun, colored pencils and watered down acrylics. I happened to have some old Ivy and silk flowers laying around! The idea was to take pictures of each of the children attending in the tower and then send them to the guests with a thank you note. That of course never happened! I'm working on a thank you design right now and will post that soon!


Flynn Ryder! The girls LOVE Flynn. I found the idea online for this adorable game. I simply found a decent size image of the poster online and printed it out large and tiled it together. I put each child's name on the skillet. The game follows along the lines of pin the tail on the donkey, but it's more like smacking Flynn with a skillet :) With the excitement of everything else, we completely forgot to play!


Floating lanterns are a must! I printed out the pattern on a letter size sheet of paper, wrapped it like a cylinder and taped it together with packing tape. I then hole punched each side at the top to put fishing line through to hang from the ceiling!


The flags have the girls "Logo" on them, as did just about everything else at the party. I printed the flags out 2 up on a sheet, trimmed with scissors, hole punched and tied with ribbon. What a great, inexpensive way to add decor and color!

The centerpieces were a list minute idea. I knew I wanted to make Oreo Cookie Pops, but wasn't sure how to display them. I ended up buying paper mache boxes at the craft store, wrapping them with ribbon and attaching a printout of Pascal. I added some decoration by printing out graphics and glueing them to sticks to put around the cookie pops. The sticks are pushed into styrofoam which is hidden by the purple crinkled paper. You MUST try oreo cookie pops, the are fantastic! I followed these directions... 

Pascal's party blowers were way more of a challenge than I thought they'd be. I found the template and directions on Disney's site. It was almost impossible, oddly enough, to find the party blowers! I had to purchase ones that had designs on them and disassemble them. These are made with foam sheets which would NOT stay glued together on the edges due to the bulky blower. I ended up using packing tape around all the edges. While they were adorable, I would strongly advise skipping the glue all together and just taping them!

The cake and cupcakes? Well those of course, was created by my parents, CreativeCakes. They did an incredible job as always! The girls could not stop talking about it. I found the idea for the cupcakes and just loved how it tied in with theme!


I had so much fun setting up Pascals' Party Mix, complete with pretzels, banana chips, dark chocolate chip, rainbow gold fish, nuts, raisins and Cheerios! We had a chicken wrap buffet, aptly named, Rapunzel's Wraps and the guests loved it. 


The favors were tiny paint sets that we put in favor bags and applied labels to.


And of course no Princess party would be complete without a princess right?
All designs by Lil' LJ/Double E Design.

Monday, September 12, 2011

Are You Ready for Some Football : Daddy's No. 1 Draft Pick

It's almost fall, time for wonderful fall weather, pumpkins, Halloween and in Western Pa, where we are from, there is nothing like the start of football season. I have to admit, I don't catch all the Steeler games with 2 three year olds roaming around, but most of my friends and family bleed Black 'n Gold.

One of my highest selling designs is now Daddy's #1 Draft Pick. It's available in any team/color and the back is personalized with a name and number. You can also add the lil' ones name to the front along with birth date. What a perfect new baby gift for a fall baby or for your favorite toddler! So far, I've created this for fans of the 49ers, Cowboys, University of Texas, Steelers, Saints, and slew of others.

And for our true Steeler fans, the Black + Gold = 7 design is in hopes that this year we get ring number 7!


Monday, August 1, 2011

Shirts for Sesame Place!

We visited Sesame Place, an amazing children's park just outside of Philadelphia, in June. I just had to make the girls shirts. After some research, creative thinking and some inspiration from some fellow bloggers, I ended up making them dresses. Emma is in the red, E is for Elmo dress and Mady was a little non-cooperative, she's in the blue M is for Mady and ME LOVE COOKIE dress.

I made skirts following this blogger's advice for Halloween and thought I'd incorporate the ruffles in the girls dresses...


I bought them white shirts that were a size larger and used the ruffle to hide my stitching at the bottom of shirt. I got the idea for the dress skirt from a bunch of random photos on the internet. 

I used iron on adhesive for the letters and then hand stitched around them for a little extra finesse.

While the photos don't do them justice, these are finished products! 


All in all, I learned a lot from the process. One of the biggest lessons learned - when sewing, always double, triple check you have removed ALL the pins. We found a few still in their dresses they day they wore them! OOPS! I hope to improve upon my sewing skills with each project. I would love to offer some hand sewn products to my Lil' LJ site - eventually! :)

Wednesday, May 25, 2011

Father's Day - FREE Printable!

Remember the adorable tag I made for my girls to give to my husband for Valentine's Day?


Well, I thought it would make a great Dad's day gift too! Just click on the image to view it larger and print! Punch a whole a the top, string ribbon through it and tie it around a Starbuck's Card. What dad wouldn't love that :)  Or have the kids make dad a mug and tie it to the handle.


And don't forget the adorable bodysuits and tees dad would love to see his lil' one in. Lil' LJ


Wednesday, May 18, 2011

Congratulations to our Winner!

Melissa C. won our giveaway! Thanks to Melissa, our customers, friends and family, we've raised over $1300 this year for March of Dimes.